Sunday, December 6, 2015

Art Supplement: How To Cut a 6-Point Snowflake

In nature, snowflakes always come in 6 "points" (share pictures with your students if you like!), and teaching kiddos how to emulate this in their paper crafting is great fun. They love opening their folded and cut "triangles" to discover what kind of pattern they've created.

Here's how to do it!

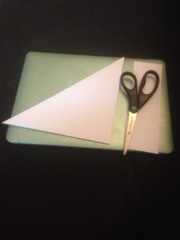
If you're starting with plain old printer paper, cut the rectangle down to an even square. You can do this without measuring! Just fold one corner down flush with the edge. The bit that's still sticking out is what you need to cut off and set aside. 
(Sometimes I pre-cut the starting page into the needed square for the kids, depending on the size of the group and the time constraints.)

That fold we did to mark our square was coincidentally also the first step! 

If you are giving your students square pieces to start with, instruct them to fold their page in half to create the first triangle. 

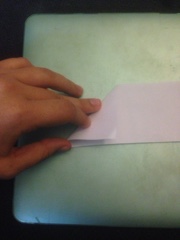
Step two is to fold our triangle into a second, smaller triangle. 


Now here comes the tricky part. Most students will need to go over this several times before they remember how this should look. 

Bring the triangle to an upside-down pyramid. 

Fold one corner up to meet near the center, keeping the bottom point in that pointy shape. 

Then cross the other side over the top. We call this stage the "fox face."

Hardest part is over! Nearly there!

Cut off the "ears" of the top; this we refer to as the ice cream cone stage. 

I followed a kind of semi-circle line here but straight across works as well. 

Once you have your cone shape, start cutting! Random little bits removed from the bottom, either side, and top all make your snowflake more interesting. Play with large vs small sections. Nothing is off limits! Just don't let cuts intersect: they'll end up cutting your snowflake in half. 


Carefully unfold to unveil your one-of-a-kind design - just like a real snowflake!


Festive! 

Remember that strip we set aside? Now you can make three tiny ones to accompany your big one. Waste not! 


For the little guys it's best to stick with super simple shapes. 


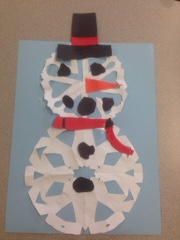
Now all these need is a little tape and they make a window look winter-ready. Or, you can apply them to a number of other projects, like our snowman collages

Let it snow! 

Saturday, December 5, 2015

Art Outline Unit 3

This week we started on some festivity!

The classic cutting snowflakes activity takes on a little twist when you use your creations to form snowmen. 

Supplies:
-Background paper (construction thickness at least). I chose a grayish blue.
-Printer paper. Plain white sheets are best. Trying to cut through anything thicker, once folded, is too challenging for student scissors. (Some people use coffee filters for this and they work well.)
-Small scraps of accent papers. I supplied black for hats and coal, red for scarves, and orange for a carrot nose. 
-Scissors
-Glue

Time:
45-60 minutes. 
Once the students get rolling this goes very smoothly, but they usually need help with the folding directions quite a bit at first. 

(Instructions for a true to nature 6-point snowflake can be found here!)

By now most of the students have done some kind of snowflake project in their elementary careers. I just gave them guidelines and they went to town! 


I gave them the option of using a cut snowflake for their snowman's head, or a solid circle they cut. Most chose a snowflake head because once you get going they are really irresistible!


Friday, November 6, 2015

Art Outline Unit 2

This week's second grade project included several art vocabulary talking points, including warm and cool colors, unusual shapes, and how we can mix mediums to get the unique benefits from different materials.

Supplies: 
-pencil to sketch 
-watercolor paper
-watercolor paint and brush set
-black crayon 
-small cups of water/paper towels, for wetting and dabbing the brush. 

Time:
35-50 minutes (some students like to take their time and be more meticulous; others like to rush and be done. This gave a good range for both kinds). 
Plus 5-10 minutes of cleanup. 

I love seasonal studies, so I drew several examples of autumn leaf shapes on the white board. The students either copied mine (in pencil) or felt free to follow their own imagination and memory. 

Next we traced our leaves in thick markings with our black crayon. We discussed how the waxy crayons would resist watercolor paint and show boldly even after we added our colors. 

Finally the students added paint. Warm colors for inside the leaves and cool colors to surround. I explained how to use more water to diminish the tone of the background, so the saturated leaves would really stand out. Some of the students used this option and some chose to match the intensity of the leaves with their background. 

A few samples from today:


Friday, September 25, 2015

Art Outline Unit 1

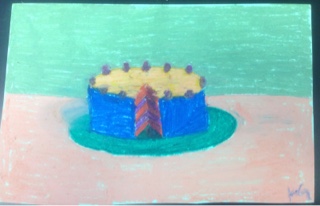
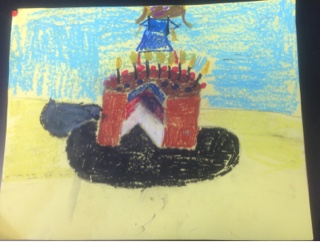
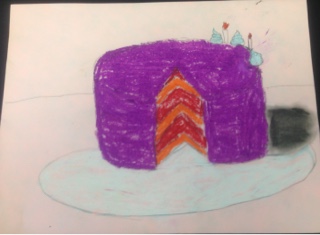
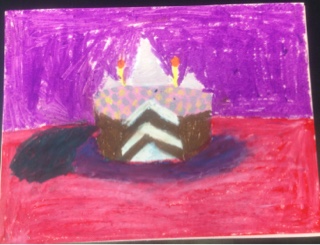
Second grade art lesson studying saturated colors and strong shadows in the style of Wayne Thiebaud.

Supplies:
-Light colored construction paper (I gave three options--if the kids didn't have time to completely cover their paper it would still look vibrant with the color of their choice).
-Oil Pastels

Time:
40 minutes, plus 5 to clean up.

After a quick introduction to the artist and his style, we got going.

Direct draw the outline of a round cake, cake plate, layers inside, and a line across the back to differentiate wall surface and table surface. Explain where to erase for the 'cut out slice' section.

Emphasize vibrant color choice.

Teacher Sample:

Just a couple of the Students' work examples:


Wednesday, May 13, 2015

Called to Order

Sometimes I'm the ancients Greeks, staring up into the abyss and conjuring shapes from a mess of scattered light. I'm assigning names and histories and reasons, which in turn create something for me--a name, and history, and reason. Maybe even purpose.

Sometimes I'm the mathematician, correlating symbols to repeating patterns in physics, in weather, in chemistry. I'm crafting an equation, a sentence in numbers, to explain, or to derive, possibly... to establish.

Sometimes I'm the surgeon. Slicing or dissecting, to see that everything is set to right. The twists and the curves don't bother me. I recognize the system in the mess.

Sometimes I'm the the artist, transposing the same shape over, and over. Designating meaning to color, and shade, and line. Completing the picture.

Sometimes I'm the drawing.
Sometimes I'm the anatomy.
Sometimes I'm the formula.
Sometimes I'm the constellation.

Sometimes I hope someone will call me out from the chaos. Will carve out my place and set me upon it.

Sometimes I have to do it for myself.

Sunday, May 3, 2015

Rehash

Today I was inspired by a friend to write something--anything! once a week or so. Wednesdays, perhaps, and neglect this poor dusty blog no longer. Wish me luck?